
This article explains how Single Sign-On (SSO) works in CtrlPrint, what to prepare before activation, and what CtrlPrint Administrators need to do to enable it.
How SSO works with CtrlPrint
Single Sign-On (SSO) lets users log in to CtrlPrint through their organization’s identity provider, such as Microsoft Entra ID/Azure AD, Okta, or Google Workspace, instead of using a separate CtrlPrint password. Authentication is managed by the company’s own access management setup, while users keep their existing permissions and project access in CtrlPrint.
How this works in practice:
-
Company-wide Activation: All CtrlPrint users within a company space must use SSO to log in. Because this feature is company-wide, exceptions cannot be made for individual users. Please note that SSO will not be enabled for external users (designers, freelancers, etc.) who are under another company space.
-
Log in via URL only: All users log in through https://secure.ctrlprint.net. You cannot access CtrlPrint through a direct link from your identity provider (IdP).
-
Login Flow: Users enter their unique CtrlPrint username and are then redirected to their company's IdP for authentication. Once the authentication is complete, they are logged in to CtrlPrint.
Checklist before getting started
Before activating SSO, confirm the following:
-
Review Documentation: Please read this full article before you start the process of activating and implementing SSO.
-
User account: Users who will log in with SSO must already exist in CtrlPrint. Ensure that your internal IT team has assigned the relevant users to the correct group in your IdP to allow SSO access.
-
IdP uses “email” as a means of identification: Your IdP should use email address as a means of identification (for example: a phone number (see image below) would not be valid). Our SSO solution requires that the main form of authentication is the user's primary email address.

-
User email addresses match in CtrlPrint and IdP: Make sure that each user's email address in their CtrlPrint profile is identical to the one used in the IdP. It is important to note that email addresses are case-sensitive, so First.Last@Email.com will not match first.last@email.com. If they do not match, ask your company administrator to update the email address in CtrlPrint to match the one used in your IdP.
For CtrlPrint Administrator: Activating SSO
If you are a CtrlPrint administrator, your role is to prepare the environment and coordinate with your internal IT for SSO setup. Single Sign-On (SSO) is enabled at the company level by an Administrator. You can check who your Administrator is by following this article: Who is My CtrlPrint Administrator?
- Log in as an Administrator and click on the company name where you want to activate SSO.
- Use the toggle option found on the right side of the page to start the setup process.

- Copy the required information and provide it to your internal IT team so they can set up your IdP (identity provider). Do not log out until the process is complete. We currently support only SAML 2.0.

- Once your IT has configured your IdP, click Continue to provide the necessary metadata for CtrlPrint. Ask your internal IT team for either a link to the metadata, if it is hosted online (recommended), or the metadata file and upload it to the CtrlPrint server in this step.

- After adding your metadata file, click the Verify SSO… button to confirm that the provided information is correct and compatible.

- Once your metadata has been verified, click Continue.

- Check the I agree option and click the Activate button.

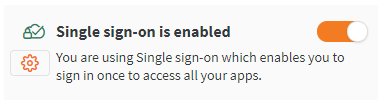
- SSO will now be active for all users in the company. Once activated, all users within the company will receive an email informing them of the change in the login process.
- If you need to update the metadata provided, please see this page for more information.
- After the setup is complete, please make sure users can log in. If they have any issues, revisit the checklist above and also check our Troubleshooting SSO article.