Part 1: Get a Preset File
Important Note: The default PDF preset used in CtrlPrint automatically includes hyperlinks and accessibility tags (Create Tagged PDF). The files available for download below are basic versions. They do not include hyperlinks and accessibility tags (Create Tagged PDF).
You can download standard ready-made presets below:
| High resolution (300 dpi) | Download |
| High resolution spreads (300 dpi) | Download |
| Standard resolution spreads | Download |
| Standard resolution with page info and time stamp | Download |
Option: Create your own
If you are an InDesign user and want to create a custom file, see the How to create a custom preset section.
Part 2: Add the Preset to CtrlPrint
Once you have your file (ending in .joboptions), you need to upload it to your project.
Note: You must be an Administrator to do this.
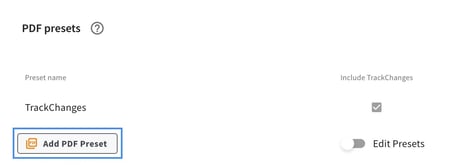
- Log in to CtrlPrint and click on your project name.
- Scroll down to the very bottom of the project page.
- Click the "Add PDF Preset" button.
4. Click "Choose file" and select the .joboptions file from your computer. Make sure to choose whether you would like TrackChanges included or not.

Part 3: Activate the Preset
After you upload a new preset, it will not appear immediately for your chapters. You must "refresh" the chapters to make the new option visible.
- Download the chapter(s) you want to use the new PDF setting on.
- Save the chapter back to the server.
- The next time you download a PDF, your new preset will be available in the list.
How to Create a Custom Preset
If you have specific needs (like including bleed marks or timestamps), you can create a preset in Adobe InDesign:
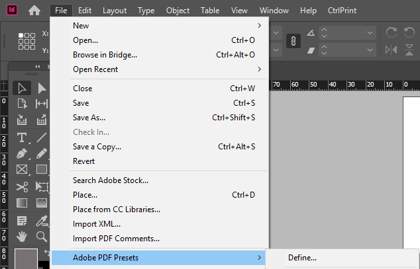
- Open Adobe InDesign.
- Go to File > Adobe PDF Presets > Define…
- Click New and name your preset.
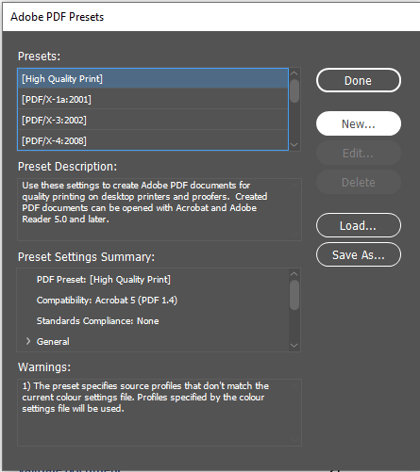
- Define your settings that you want (e.g., turn on "Bookmarks" under the General tab).
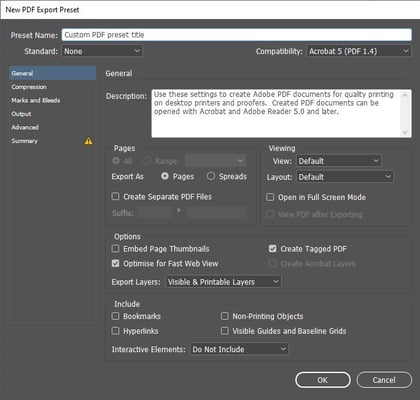
- Click OK.
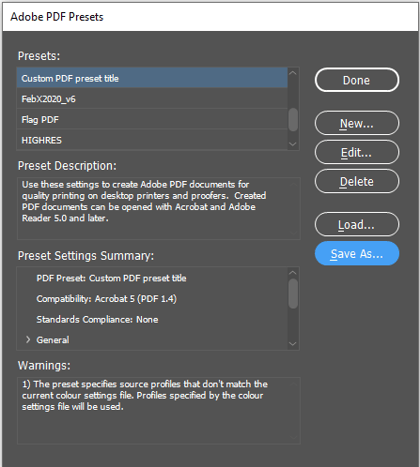
- Select your new preset from the list and click Save As to save the .joboptions file to your computer.
- Upload this file to CtrlPrint using the steps in Part 2.
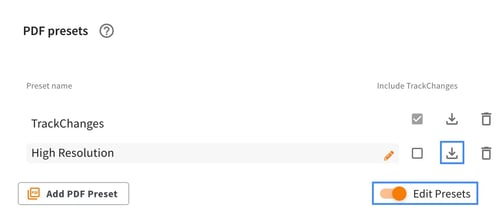
How to Download an Existing Preset
If you want to save a preset from CtrlPrint to your computer (to share it or use it elsewhere):
- Go to your project page in CtrlPrint.
- Scroll down to the PDF Presets section.
- Click the Edit Presets toggle switch.
- Click the Download icon next to the preset you want to save.