
Table of Contents
- CtrlPrint Integrate Panel
- Link Existing Table to Data Source
- Insert Data
- Update Data with New Version of Data Source
- Relink Data
- Filter and Sort Named Ranges
- Reset to Data Source
- Link to Source Broken
- Unlink the Data
You can check how to upload a new data source and manage versions here. Once the data source has been uploaded to CtrlPrint Integrate, the data can then be added to your InDesign document. You need either Viewer or Editor CtrlPrint Integrate file permissions to insert and update data from your data source.
CtrlPrint Integrate Panel
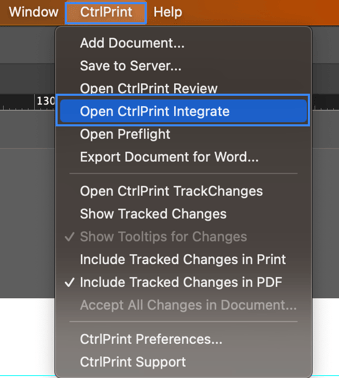
Open the chapter in InDesign/InCopy. Navigate to the CtrlPrint Menu and select Open CtrlPrint Integrate.
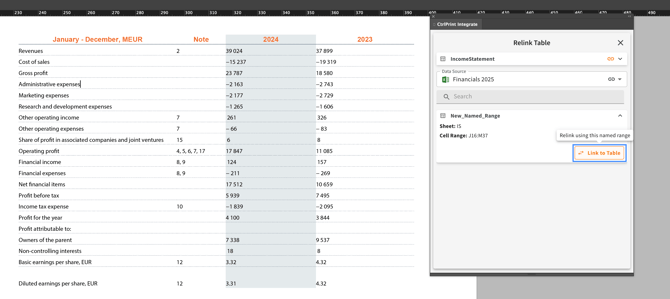
Link Existing Table to Data Source
You can now link an existing, non-Integrate table directly to a named range in InDesign and InCopy. Once linked, the data from your Excel source will automatically populate the table. To link an existing table with a named range from your data source, place your cursor on the table you want to link, open Integrate Panel and click Link Table next to the table you want to link.
If you do not have existing tables in your document or are either inserting single-cell text or using Word Integrate to insert content, please check below on how to insert data to your document.

Insert Data
- Select the text frame where you want to place your data.
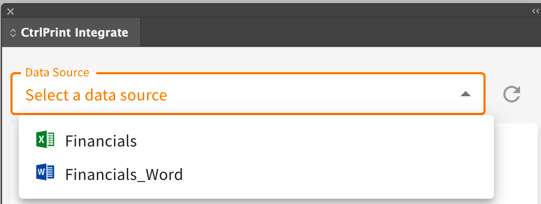
- Open the CtrlPrint Integrate Panel.
- Find and select your data source in the data source search field. You can see if your data source is Excel or Word by the icon for the data source.
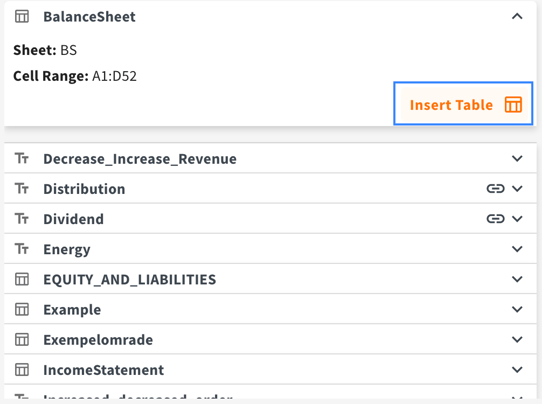
- Insert the named range/bookmark from the data source by clicking the Insert button.
- For Excel data sources, you will see Insert Table button for named ranges containing a table and Insert Text button for single-cell (text) named ranges.
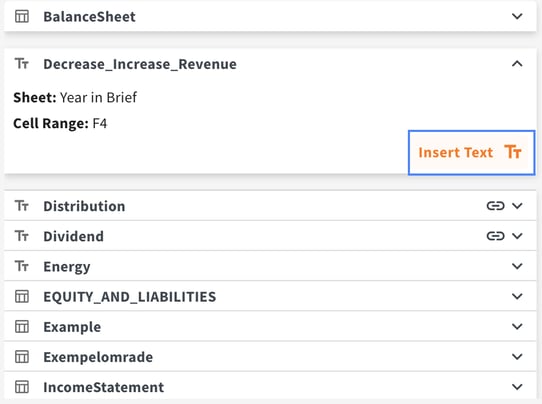
- For Word data sources, you will see the Insert Content button.
.png?width=570&height=683&name=Insert%20Content%20(1).png)
- After inserting the data, it is essential to format it according to your design preferences.
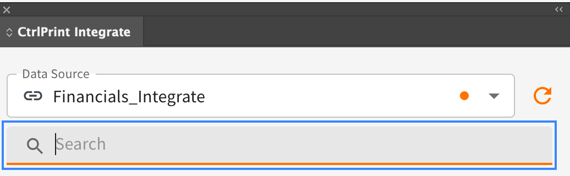
If the data source has more than eight named ranges/bookmarks, a search functionality (as shown in the image below) automatically becomes available which allows you to quickly locate and insert the specific data you need.
Update Data with New Version of Data Source
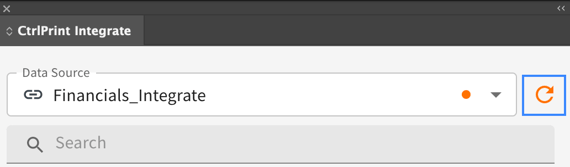
If a new version of the data source is available, you will see an indication (an orange highlight on the right hand side) next to your data source file as shown in the image below.
Please note: If your document was already open in InDesign/InCopy when the new version of the data source was added, you need to save the document back to the server and open it again to see the indication of the new version of data source.
After you open your data source in the CtrlPrint Integrate Panel, you will be able to refresh the data by clicking on the orange refresh button on the right-hand side as shown in the image above.
It is also possible to update individual data elements linked to your data sources to selectively update information in your chapters without affecting other linked Integrate elements in your documents.

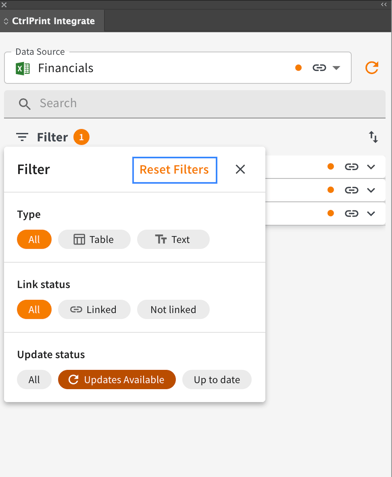
Filter and Sort Named Ranges for Excel
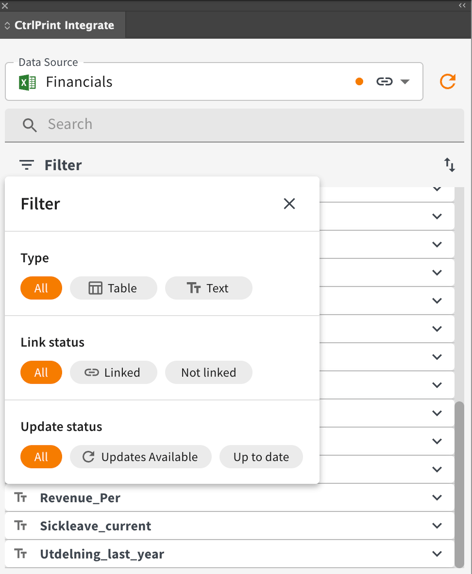
If you have several named ranges, you can filter it based on type, link status and update status, by clicking the Filter option as shown below.
You can reset your filters by clicking on the Reset Filters button as shown below.
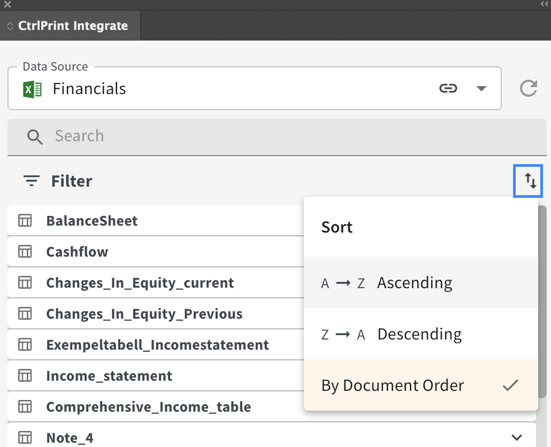
You can also sort your named ranges in ascending, descending or by document order as shown below. When you select By Document Order, it sorts the linked name ranges in the order that it appears in the document.
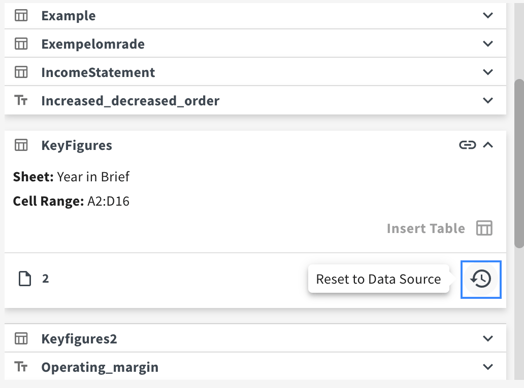
Reset to Data Source
If you edit the data in your data by mistake, you can click Reset to Data Source so the data reverts back to what you have in the linked data source.
Relink Data
To change the source of linked tables or single-cell text without having to re-insert and re-format them, you can relink the data. Click on Relink table button next to your currently linked data source, then click Link to Table button next to the new data source you want to relink. 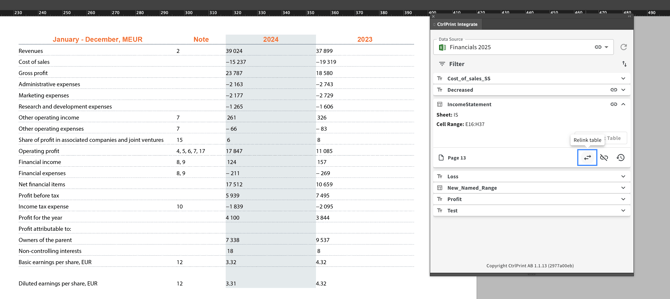
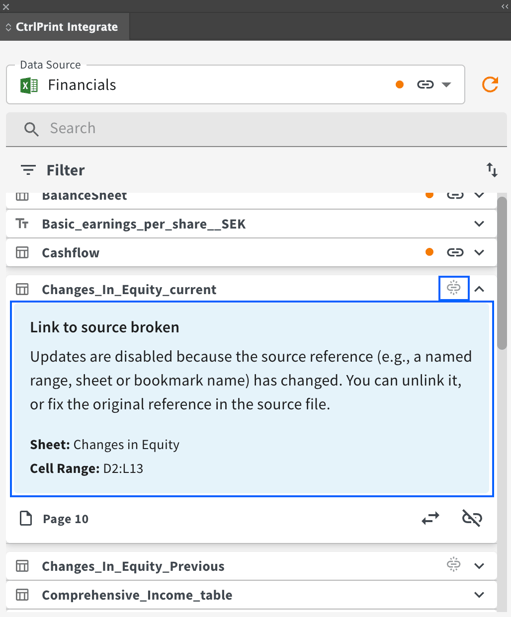
Link to Source Broken
If the link to source has been broken (which can happen either if named ranges or worksheets in Excel and bookmarks in Word have been renamed or deleted), then you get the warning as shown in the image below. You can either unlink the data (following the instruction after this section) if you meant to remove this on purpose, or relink it (as explained above).
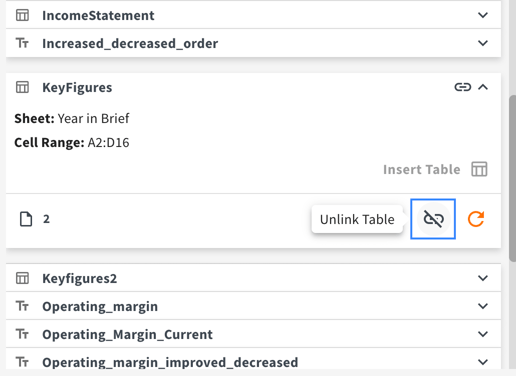
Unlink the data
In order to disconnect the data from its data source, click the Unlink button as shown in the image below. Once you have unlinked the data, it can not be refreshed anymore when a new version of the data source is available, but you can manually modify the data.
Adding or deleting rows/columns in existing data source for Excel
Adding or deleting rows or columns within the named range will expand or contract the named range automatically. Adding or deleting rows or columns outside of the named range (for example: adding a row/column at the beginning or end of the table), you will need to redefine the named range. Note that you may need to manually adjust the table formatting in InDesign or InCopy to accommodate the new layout.