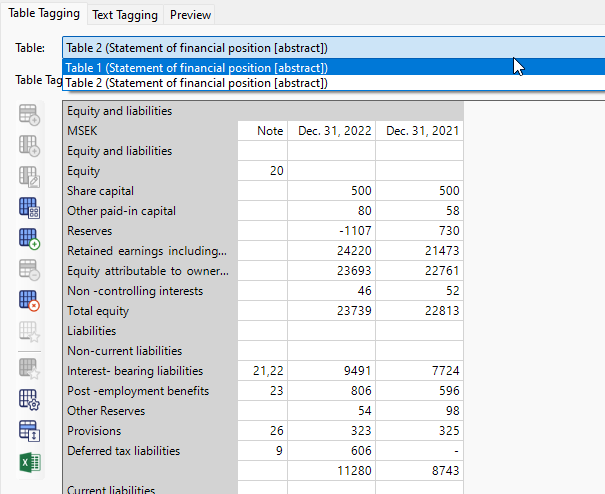
If your report contains a table that has been split (common for balance sheet statements in a landscape mode document), there are two different methods to pursue when applying tags to these.
Method 1:
- Highlight the left part of the table and apply an abstract tag.
- Highlight the right part of the table and apply the same abstract tag.
- From the Table Tagging tab, select the correct table and apply the cell tags.
Method 2:
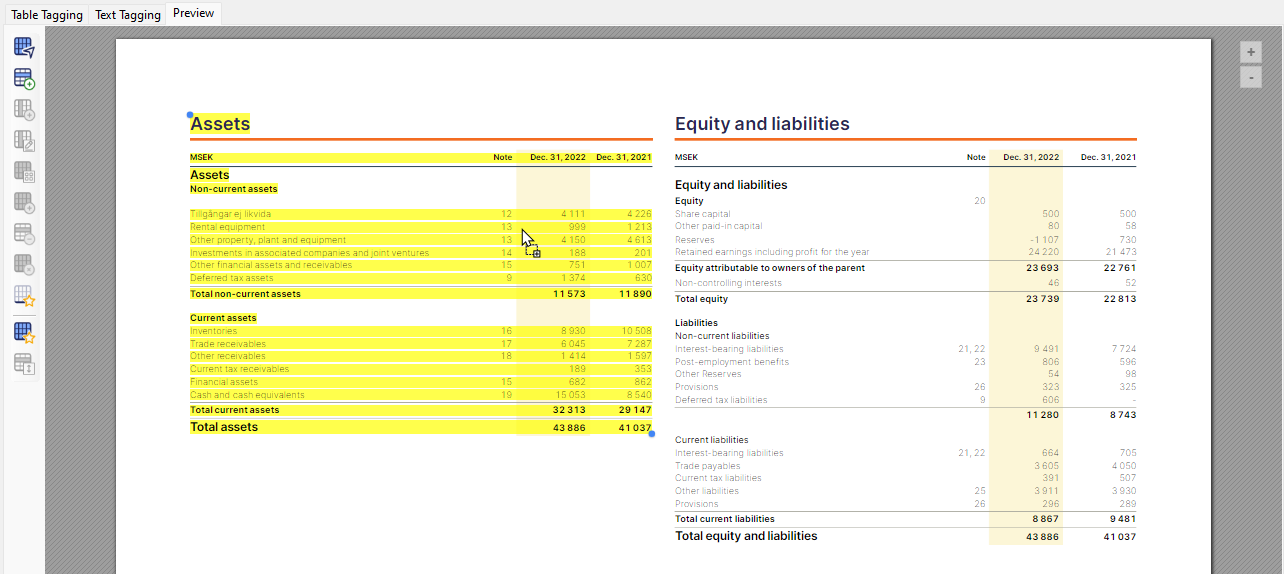
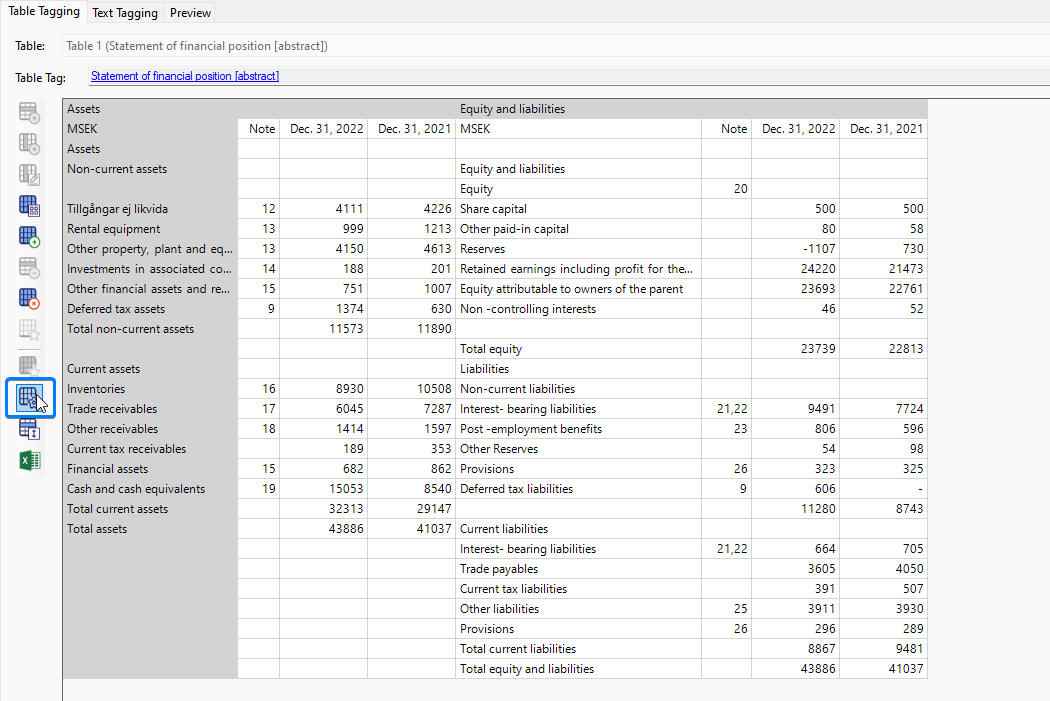
- Highlight both parts of the table.
- Choose the relevant abstract for the table and then drag and drop it somewhere on the yellow highlighting.
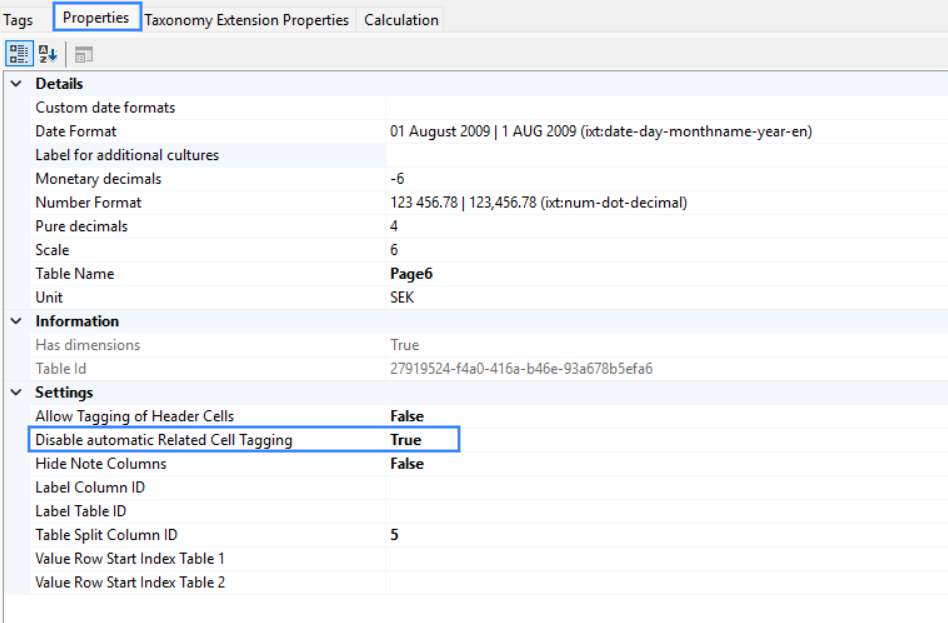
- In the Table Tagging tab, click on the Table Settings icon.
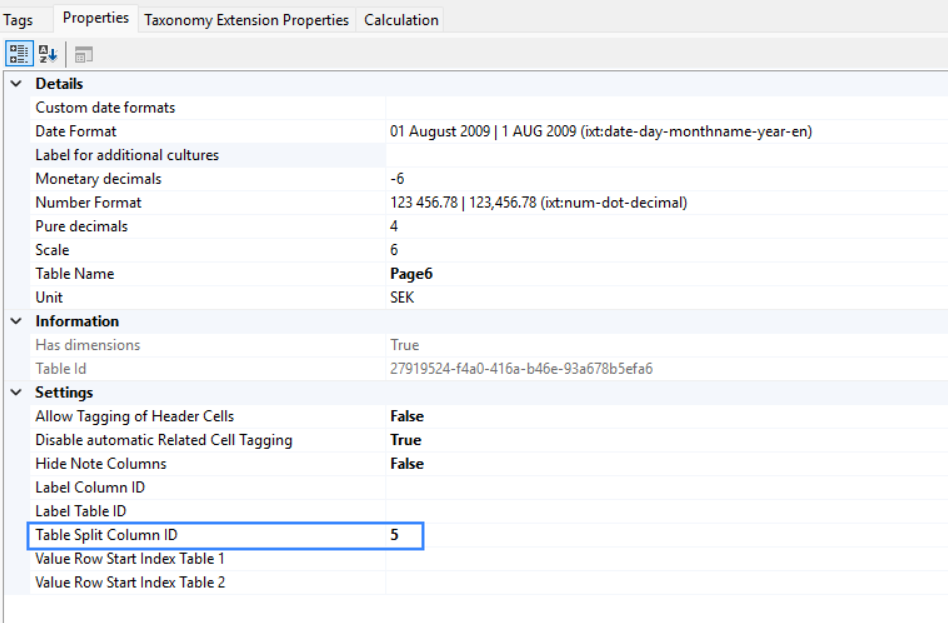
- In the properties tab and in the row "Disable automatic Related Cell Tagging", set this to True.
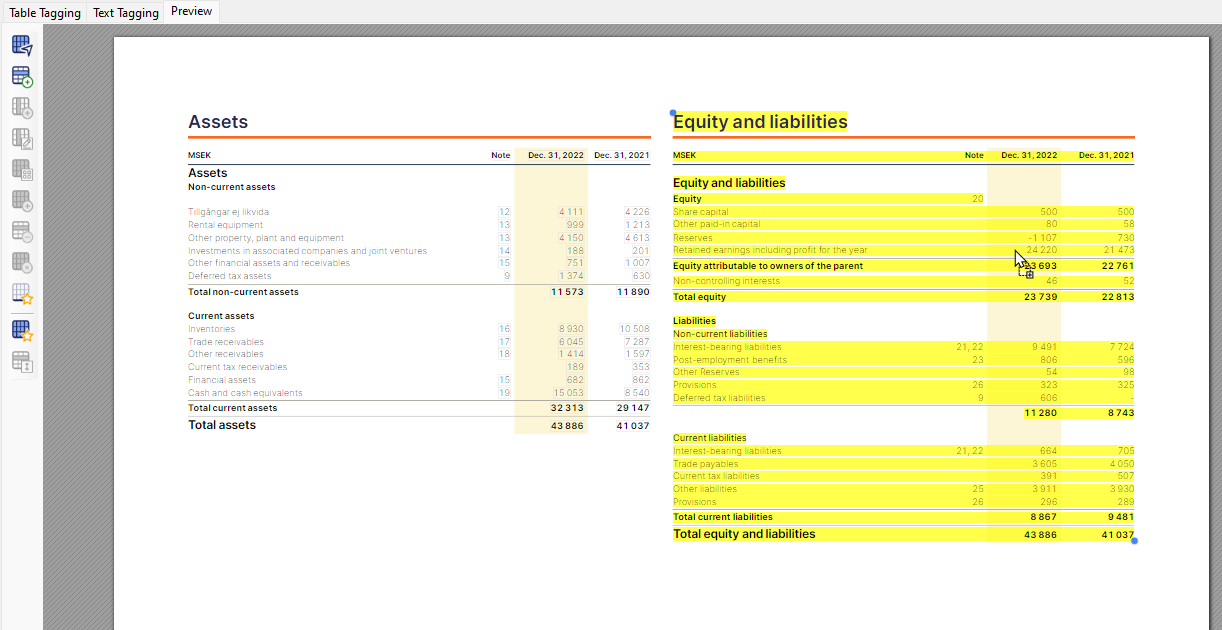
- You can then go ahead and tag your cells, please note that you need to tag every cell individually.
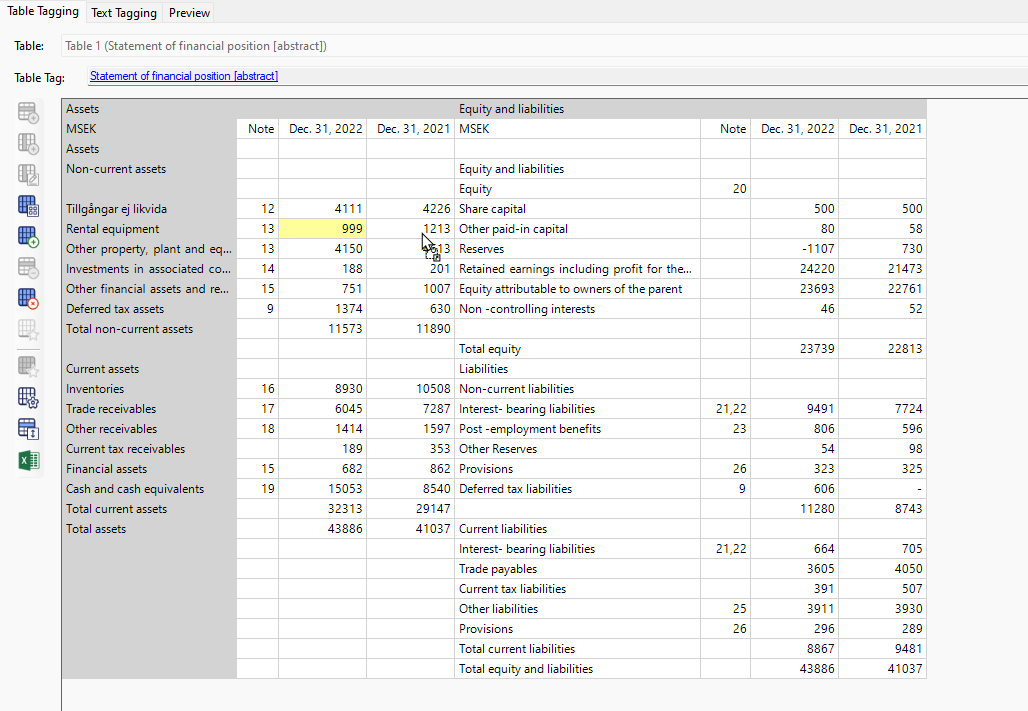
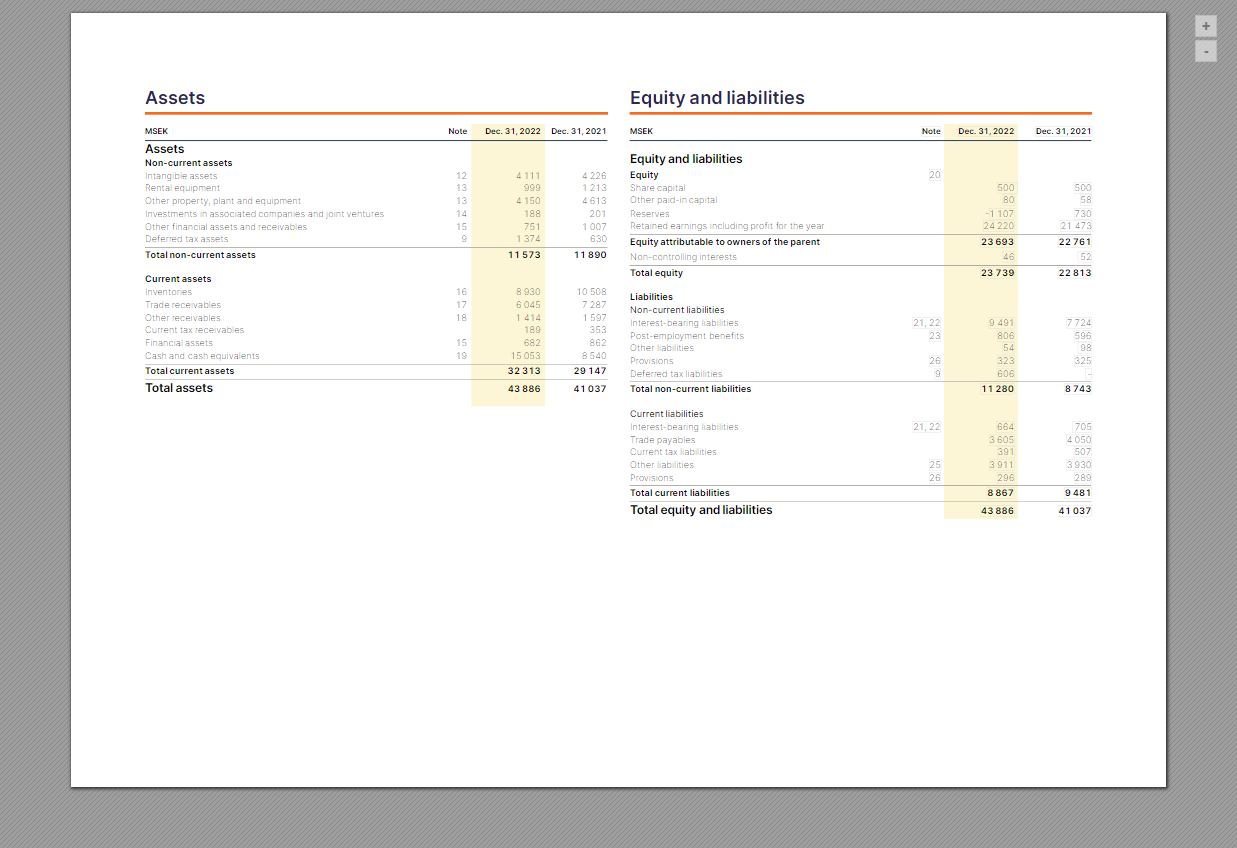
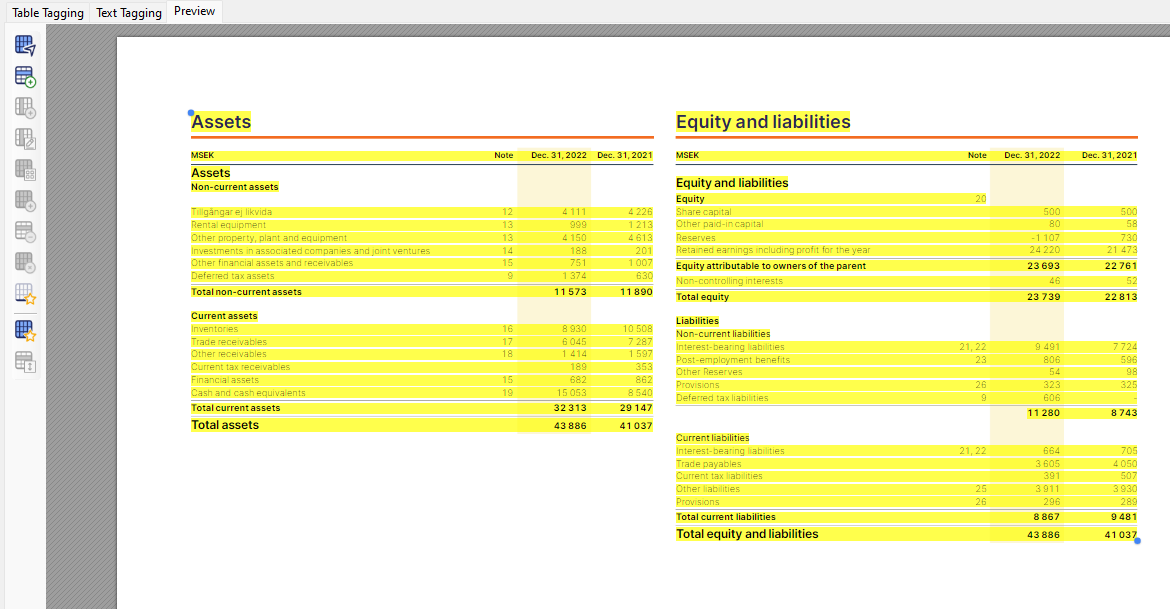
- We recommend to update the Table Split Column ID to the column in which the table will be split. (For example, if you see the image above, "Assets" table ends in 4th column and "Equity and Liabilities" table starts in 5th column so these two tables are split in the 5th column so your Table Split Column ID would be 5 in this case.)
This will allow the correct table row label to be displayed when you hover over the cell.